


Testing a hoverboard battery is simple when using a digital multimeter to measure its exact voltage output. By comparing your reading to the battery’s rated voltage, you can easily tell if it needs a deep charge or a full replacement. This quick diagnostic check will save you money and keep your hoverboard rides safe and fun.
Picture this. You get your hoverboard out on a beautiful, sunny afternoon. You want to slide down the driveway and enjoy the fresh air. You step on the board, but nothing happens. A red light blinks. The board makes a sad, high-pitched beeping noise. It just sits there, completely lifeless. Your fun afternoon plans are suddenly ruined.
Most of the time, the culprit behind this issue is the battery. The battery is the heart of your ride. When it stops working, your hoverboard becomes a very heavy, expensive paperweight. But you do not have to guess what is wrong. You can find out the truth yourself with a few simple steps.
This guide will teach you everything you need to know. We will look at why batteries fail and what tools you need to test them. We will go through a simple, step-by-step testing process. By the end, you will know exactly how to handle your hoverboard issues and get back to riding in no time.
Key Takeaways
- Use a Multimeter: A digital multimeter is the most reliable tool to check your battery’s true voltage.
- Know the Rated Voltage: Most hoverboard batteries are rated at 36 volts and should read around 36V to 42V when healthy.
- Safety First: Always turn off the hoverboard and work in a dry, clear workspace before opening the case.
- Watch for Warning Signs: Blinking red lights and short ride times are key indicators of a dying battery.
- Check the Charger: A charger light that stays green while plugged in often points to a dead battery.
- Proper Storage: Keep your battery at a partial charge in a cool place to extend its overall lifespan.
📑 Table of Contents
Why Test Your Hoverboard Battery?
Testing your battery is the best way to save time and money. Many people throw away good hoverboards because they think the motor is broken. In reality, they just needed a simple battery swap. Testing gives you clear answers before you spend money on new parts.
Signs Your Battery is Failing
Your hoverboard will usually try to tell you when something is wrong. One of the most common signs is a blinking red light in the center of the board. If this light blinks green, your battery is fine. If it blinks red, it means the battery charge is low or the battery has a system error.
Another sign is a very short ride time. If your hoverboard dies after just five minutes of use, the battery can no longer hold power. You might also notice that the board lacks power when you try to climb small hills. It may feel sluggish, heavy, or slow to respond to your movements.
The Cost of Ignoring Battery Issues
Ignoring a bad battery can be dangerous. Hoverboards use lithium-ion batteries. These batteries hold a lot of energy in a small space. If a cell inside the battery is damaged, it can overheat. Overheating can lead to melting plastic or even fire hazards.
Testing your battery early keeps you safe. It also prevents damage to other parts of your hoverboard. A bad battery can put extra stress on the main motherboard. If the motherboard breaks, your repair costs will double. A quick test keeps your wallet and your home safe.
Safety First: Preparing for the Test
Before you touch any wires, you must prepare. Safety should always be your top priority when dealing with electricity. Lithium-ion batteries deserve your full respect. Follow these simple safety steps to keep your workspace secure.
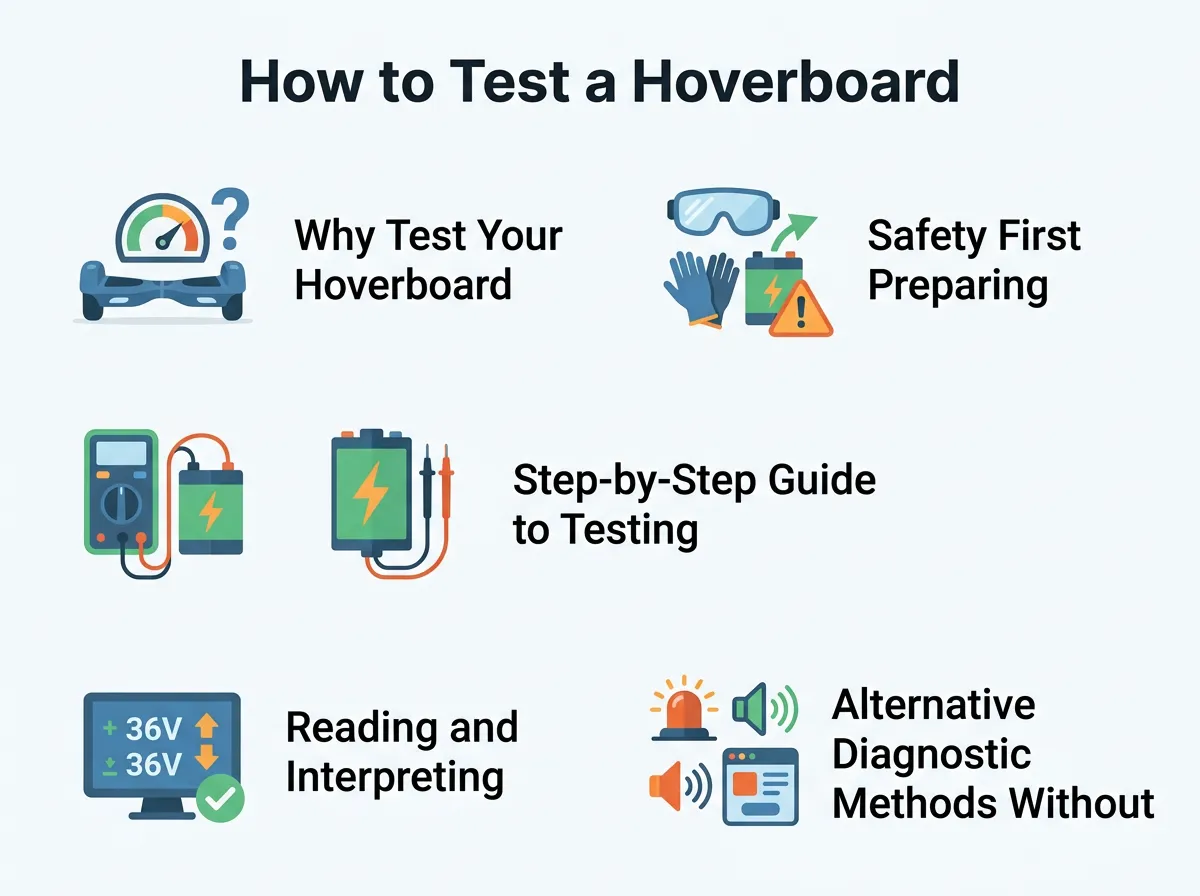
How to Test a Hoverboard Battery? — key points at a glance
Essential Safety Equipment and Workspace
Always work on a clean, flat, dry table. Water and electricity do not mix. Make sure there are no metal objects like keys or loose coins near your work area. These can cause a short circuit if they touch the battery ports. It is also a good idea to wear safety glasses to protect your eyes from any sparks.
Make sure your hoverboard is turned off completely. Unplug the charger from the wall and from the hoverboard. Let the hoverboard sit for a few minutes before you start. This allows any leftover electricity in the motherboard to drain away safely.
Tools You Will Need
You do not need a garage full of professional tools. You only need two basic items to get the job done:
- A standard Phillips-head screwdriver
- A digital multimeter
The screwdriver is used to open the hoverboard frame. The multimeter is the tool that measures the electrical pressure, or voltage, of your battery. You can find cheap digital multimeters online or at your local hardware store. They are very easy to use, even for beginners.
Step-by-Step Guide to Testing with a Multimeter
Now you are ready to start. Take your time and follow these steps carefully. There is no need to rush. Working slowly ensures you get an accurate reading and stay safe.
Step 1: Accessing the Battery
Flip your hoverboard upside down on a soft towel. The towel protects the plastic shell from getting scratched. You will see several small screws on the bottom of the frame. Use your Phillips-head screwdriver to remove them. Keep the screws in a small cup so you do not lose them.
Carefully lift the bottom cover off the hoverboard. You will see wires, a motherboard, and a large battery pack. The battery pack is usually wrapped in blue, green, or black plastic. It is always located on the opposite side of the motherboard. Once you locate it, you can prepare your testing tool.
Step 2: Setting Up the Multimeter
Turn on your digital multimeter. You need to set the dial to measure DC voltage. This is usually shown as a capital “V” with a straight line above it. Do not set it to AC voltage, which has a wavy line. Set the range on your multimeter to 200 volts. This allows the meter to read the battery’s voltage accurately.
Plug the black probe into the port labeled “COM” on your multimeter. Plug the red probe into the port labeled “V” or “mAV”. Now your multimeter is ready to read the electric current. To ensure accuracy, follow a proper guide on how to test your hoverboard battery with a multimeter to get the right setup.
Step 3: Taking the Voltage Reading
Locate the yellow plug that connects the battery to the motherboard. Gently pull this plug apart to disconnect the battery. Look at the end of the plug coming from the battery. You will see two metal terminals inside the plastic connector.
Carefully touch the red probe of your multimeter to the positive terminal. Touch the black probe to the negative terminal. Look at the screen on your multimeter. It will display a number. This number is your battery’s current voltage reading. Write this number down on a piece of paper.
Reading and Interpreting Your Results
Now that you have your reading, what does it mean? Understanding these numbers is the key to solving your hoverboard mystery. Let us look at what different voltage numbers tell us about your battery’s health.
What a Healthy Reading Looks Like
Most standard hoverboards use a 36-volt battery pack. When this pack is fully charged, it should actually read higher than 36 volts. A healthy, fully charged battery will show a reading between 36 volts and 42 volts on your multimeter.
If your reading is in this range, your battery is in great shape. Your hoverboard issues are likely caused by something else. You might have a loose wire, a broken power switch, or a faulty motherboard. Knowing this saves you from buying a new battery that you do not need.
What a Failing Reading Looks Like
If your multimeter displays a reading below 30 volts, your battery is in trouble. This means one or more cells inside the battery pack have died. The battery can no longer hold enough energy to run the hoverboard’s powerful motors. If your hoverboard turns off immediately after unplugging, you might face a situation where the hoverboard battery won’t retain charge at all.
Sometimes you might get a reading of 0 volts. This means the battery’s internal safety switch has tripped. This happens when the battery gets too hot or suffers a short circuit. A battery with a 0-volt reading is dead and must be replaced immediately for your safety.
Alternative Diagnostic Methods Without a Multimeter
What if you do not have a multimeter? Do not worry. There are other ways to check your battery’s health. While these methods are not as precise as a multimeter, they can still give you a very good idea of what is going wrong.
The Charger Light Test
Plug your charger into the wall. The light on the charger brick should turn green. Now, plug the charger into your hoverboard. Watch the light carefully. If the light stays green, your battery is either fully charged or it is dead and cannot accept any power.
If the light turns red, the battery is accepting power. Leave it plugged in for two hours. If the light never turns green, the battery is failing. Knowing the signs of a dead cell helps you decide how to know when to replace your hoverboard battery before it stops working completely.
The Ride Duration Test
This test is simple. Charge your hoverboard until the charger light turns green. Take it outside and ride it on flat ground. A healthy hoverboard battery should last between 45 minutes and 2 hours of continuous riding.
If your hoverboard dies within 10 to 15 minutes, your battery has lost its capacity. It can display a full charge on the charger, but the energy drains away almost instantly under a load. This is a clear sign that you need a new battery pack.
How to Extend Your Hoverboard Battery Life
Batteries do not last forever, but you can make them last much longer with good habits. Proper care will save you money and keep your hoverboard running smoothly for years to come.
Best Charging Practices
Never leave your hoverboard on the charger overnight. Once the light turns green, unplug it. Overcharging creates heat, and heat is the worst enemy of a lithium-ion battery. Also, avoid charging your hoverboard immediately after a ride. Let the board cool down for 15 minutes before plugging it in.
Do not let your battery drain completely to 0% if you can avoid it. Try to plug it in when the battery warning light starts blinking. Charging the battery when it is partially empty is much easier on the internal cells than charging a completely dead battery.
Proper Storage Tips
If you plan to store your hoverboard for the winter, do not store it empty. Charge the battery to about 50% before putting it away. Store the hoverboard in a cool, dry place. Avoid hot attics or freezing garages. Extreme temperatures will damage the battery cells permanently.
Take the hoverboard out once a month during storage. Plug it in for 30 minutes to top off the charge, then put it back. This simple habit keeps the battery active and prevents it from falling into a deep sleep state that it cannot wake up from.
Conclusion
Testing your hoverboard battery is not as scary as it sounds. With a simple screwdriver and a cheap multimeter, you can become your own mechanic. You will know exactly whether your battery is healthy, weak, or completely dead. This knowledge keeps you safe, saves you money, and helps you get back to gliding down the street with a smile on your face. Keep your battery charged, ride safe, and enjoy the journey!
Frequently Asked Questions
How long do hoverboard batteries usually last?
Most hoverboard batteries last between 1 to 2 years with regular use. This equals about 300 to 500 charge cycles before the capacity starts to drop. Proper storage and charging habits can help extend this lifespan.
Can I leave my hoverboard charging overnight?
No, you should never leave your hoverboard charging overnight. Overcharging can overheat the battery cells and reduce their overall lifespan. Always unplug the charger once the indicator light turns green.
Why does my hoverboard beep and show a red light?
A blinking red light and beeping sound usually signal a low battery or a system error. If the battery is fully charged, this warning often means the motherboard has detected a dangerous voltage drop.
Can I use any charger for my hoverboard?
You should only use the charger that came with your hoverboard or an official replacement with matching voltage. Using a charger with the wrong voltage can damage the battery or create a fire hazard.
What voltage should a 36V hoverboard battery read?
A healthy 36V hoverboard battery should read between 36 and 42 volts when fully charged. If your reading is below 30 volts, the battery is failing and needs to be replaced.
Is it safe to replace a hoverboard battery yourself?
Yes, replacing a hoverboard battery is a straightforward DIY task that you can do safely at home. Just ensure the hoverboard is turned off, unplugged, and that you use a high-quality replacement battery.
